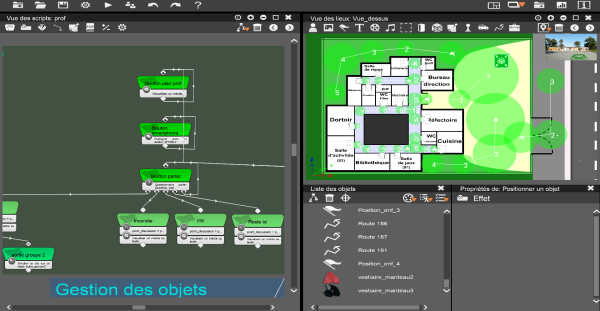
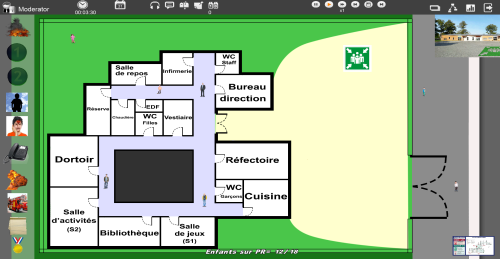
iScen is a tool dedicated primarily to the security and education sectors, for training, mission preparation and crisis simulation. It is also aimed at Serious Gaming companies. This tool allows the creation or rapid prototyping of interactive scenarios, and then to use them in networked and multiplayer simulation sessions. The editor part has an easy to use interface, which allows the quick and efficient implementation of any type of scenario. It is possible to integrate 2D and 3D multimedia content, texts, as well as internet links.
Creating a scenario
The iScen interface has been designed to be accessible to everyone. It is not necessary to have any programming knowledge to run and control a session. The scenarios are created from an intuitive interface, and with your own images, sounds, videos, 3D objects… If you don’t want to create the scenarios yourself, but only use them, Eversim can create them from your specifications and on estimate. For more information, see this page
Content creation
To create a scenario, the designer starts by defining the graphic environments. These can be photographs, videos or 3D models representing the places in which the action will actually take place, maps (extracted from Google Maps, for example), satellite views or 3D scenes. These environments constitute the places of action. Participants will be able to move from one location to another during the session. The designer then defines the actors of the scenario: the different roles/characters that the participants will play during the training session. These actors can be represented by icons, photos, counters, 3D objects. The designer also adds all the objects involved in the scenario: images, videos, sounds, 3D objects, text… Finally, the designer determines the tree structure of the scenario (its “storyline”) by adding all the steps, branches, possible choices, and key points that characterize the action. for an easy learning process, iScen offers several tutorials and examples of simple scenarios available in video on this page
Testing and tuning
During the realization phase, the designer can instantly test the scenario at any time by simply clicking on the “Play” icon. It can play the role of all the actors in the scenario, and thus verify the functioning of all the branches and conditions.
A scenario can easily be modified: in order to adapt it to a new similar project, it can be reworked to change the visuals, add or remove steps, objects, participants’ roles…
Using a scenario during a session
The sessions allowing to replay a scenario with all the participants take place in network: in local network (wifi or ethernet) or via internet. Each participant is connected to the session on a PC, or tablet or smartphone on which he will see the actions and visuals that concern him.
The different participants in a session
These are the moderator, facilitators, observers, and learners.
- The moderator is the session administrator. He leads the training. Thus, he decides the beginning and the end of the game, and controls the progress (pause, fast forward, rewind…). He has access to the statistics, as well as to the script. It also has the ability to take control of any other actor.
- Learners: these are the users for whom the training or coaching session is intended. Each learner will play the role of one of the actors in the scenario.
- Facilitators are there to supervise the game: they can help the learners by taking control of the players involved. They can also temporarily replace absent participants, who may be needed for the scenario to run smoothly.
- Observers can navigate the scenario freely and observe the learners. Their decisions and actions are recorded and can be evaluated.
Installation of the participants' machines
Setting up a networked gaming session is very simple to do: each computer or smartphone or tablet must be connected to the network via Wifi, or 4G/5G, or Ethernet cable, either within a local network or via remote internet. It is desirable that the moderator’s workstation (which operates in “server” mode) has a comfortable network speed to ensure that the sessions run smoothly. iScen automatically manages all connections and data exchanges on the network.
Course of a session
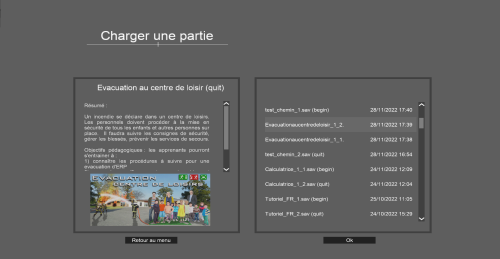
When the moderator decides, the session begins. The steps then follow each other according to the pre-established scenario. If a learner is stuck, a facilitator can help him or her, or even temporarily control the actor. Participants can communicate with each other in different ways: by voice, by messaging, or by placing notes in the environments that make up the scenario. Learners can be asked to perform collaborative tasks as part of the scenario, or they can be challenged to compete individually or in teams to overcome obstacles. At any moment you can save the situation of the session (automatic saving is also available), or go back to try to replay it differently and explore the consequences of new choices.
Session analysis
iScen automatically records the information of a game, i.e. all the decisions taken by the learners, their choices, their movements, their answers to the questions asked during the game.
History, logs and statistics
The general history unfolds the scenario of the session: the choices and branches chosen by the participants. The player history tracks all messages sent, messages received, points, answers to quizzes. Statistics are also available on responses to questionnaires, travel coordinates, clicks and time spent. In addition, the scenario designer can choose to add their own specific information to the history.
Exploiting data on a spreadsheet
The moderator can by a simple click export all the information related to the game and the players in “.csv” format, allowing them to be consulted or reworked in a spreadsheet. Thus, it is possible to create diagrams with the data collected during the game session.


